Fitting Training: How to Install Tube Fittings
Tube Fitting Installation: Everything You Need to Know
Reliable industrial fluid systems are essential for safety, efficiency, and profitability in your plant—and their ability to operate dependably relies on many factors. Some of the most important include proper tube and tube fitting installation as the system is initially assembled and maintained throughout its useful life.
What is at stake? Based on our engineering team’s experience helping provide onsite support for customers, we’ve found that two of the leading causes of leaks in any industrial fluid system are improper installation, and poor tubing selection and preparation. Loss of profitability and decreased operational efficiency are potential poor outcomes, but more importantly, safe working conditions for plant personnel can be compromised if leaks occur. Many industrial environments are home to inherently dangerous applications where the risk of incorrect installation can result in serious injury.
For these reasons, fluid system professionals must equip themselves with the basic skills required to properly install tube fittings. In this article, you’ll learn how to select and prepare the proper tubing for your installation, how to install tube fittings, and why proper installation is key to industrial workplace safety.
Jump to Section:
 Understanding Tubing Characteristics
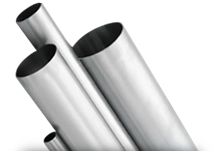
Before making a tube fitting connection, it is important to understand the many variables that exist when it comes to tubing itself. Tubing is available in a wide variety of interior diameters, wall thicknesses, surface finishes, concentricity, and other characteristics—because of the available variety, tubing can be a versatile choice for a broad range of fluid system applications.
Because of the available variety, however, it is important to be cognizant of the type of tubing you are using for any given installation. For example, a common reason for leakage in tube fittings is under-tightening during fitting makeup. This can occur when a technician pulls up tube fittings by feel. Many installers will say they have pulled up so many fittings, that they have intuition when to stop based on how the fitting feels. But each variable impacts the amount of force required to pull up a tube, and all it takes is to change one of these variables—size, wall thickness, hardness—and the fitting will feel very different to the installer.
Why Tubing Over Pipe?
Tubing presents some significant advantages over traditional piping materials, including:
- Ease of installation, requiring just standard wrenches
- Better strength-to-weight ratio, making tubing easier to work with, assemble, and fabricate
- Fewer individual connections are required due to tubing’s bendability, eliminating potential leak points
- Laminar flow of system media enabled by tubing’s smooth internal bends, which can help reduce pressure drop throughout the system
Installers should also validate that tubing is softer than the tube fitting, which will allow the fitting to effectively grip the tube. The size, shape, and overall condition of the tubing should also be validated. Excessive scratches, depressions, raised portions, or other defects can lead to imperfect seals, particularly in gas service. Tubing that is slightly oval in shape can also cause trouble and may not fit properly through fitting nuts, ferrules, and bodies.
 Tubing System Design Best Practices
There are a few best practices that can be followed when designing your tubing system.
✔ Determine the number of tube fittings and length of tubing required in the system design before beginning the installation process. When making these determinations, it is important to select enough tubing that will allow every cut to fit into the fitting bodies.
✔ When deciding the location of your connections, keep accessibility in mind. Tube fittings may need to be serviced over the course of their working life—making them easily accessible to technicians can lead to speedier maintenance.
✔ Be sure to run your tubing in appropriate routes in conjunction with other critical systems in equipment. For example, never run tubing in front of critical instrument panels. This may cause inaccessibility and potential safety concerns. Also avoid running tubing at handrail or footrail heights. This can help prevent any inadvertent contact from plant personnel, which could be a safety risk.
✔ Utilize proper tubing support across longer runs of tubing. Optimal support systems will help reduce system vibration and increase the useful life of tubing and fittings, supporting safer and more reliable system operation over the long term.
 Tubing Preparation
Once you have selected the appropriate tubing, there are best practices for properly preparing tubing before making a tube fitting connection.
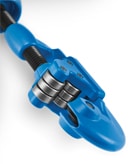
- First, use a tube cutter to cut the proper length of tubing required:
- Position your tubing between rollers and cutting wheel.
- Turn the handle until the wheel touches the tube, then advance the handle an additional one-sixteenth turn.
- Rotate the cutter around the tube. After every second rotation, advance the handle an additional one-sixteenth turn.
If a tube cutter is not available, a hacksaw can be used as an alternative. This will likely result in a rougher cut.
Watch how to use a Swagelok tube cutter and deburring tool to get a clean tube surface.
In either case, the cutting process will result in some burring on the tube ends. These burrs should then be removed with a deburring tool. Deburring is important for proper fitting function as well as for clean, leak-free systems. Burrs also have the potential to break off and cause damage to components in other parts of the system by lodging in small holes or vents, or by scratching valve seats or soft seals such as O-rings. For these reasons, tubing should be deburred before proceeding to tube fitting installation.
 How to Install Tube Fittings
While there are many different fittings to choose from, a two-ferrule, mechanical grip design that delivers hinging-colleting action can create a highly robust grip and seal in a variety of fluid system applications. Hinging and colleting action provides more material of the back ferrule in close contact with the tube adjacent to the tube grip. This material provides direct and axial support to the tube gripping function. Additionally, this design reduces the likelihood of fittings backing off in applications where vibration is a concern and allows for a very small amount of movement in the fitting while maintaining the appropriate levels of grip and force. This movement, called “spring back,” creates robust vibration resistance. Additionally, by creating long lines of sealing contact between the ferrules and the tube, this mechanical design creates a highly reliable gas seal.
Installation Safety Tips
- Never bleed system pressure by loosening a fitting nut
- Never install or tighten fittings when system is pressurized
- Always ensure tubing rests firmly on the shoulder of the tube fitting body before tightening the nut
- Never turn fitting body during assembly—this can damage sealing surfaces
Installation of two-ferrule, mechanical grip tube fittings—such as the Swagelok® tube fitting—can be completed in three simple steps.
Step 1: Insert the tubing into the tube fitting. Make sure the tubing rests firmly on the shoulder of the fitting body and that the nut is finger tight.
Step 2: Mark the nut of the fitting at the six o’clock position.
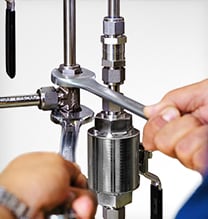
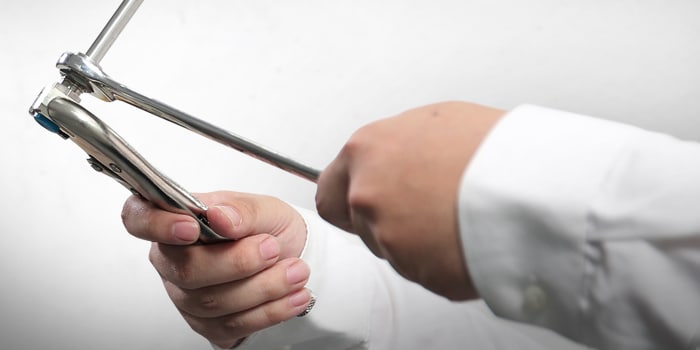
Step 3: Hold the fitting body steady and tighten the nut one-and-a-quarter turn.
After initial assembly is complete, technicians should then use a gap inspection gauge to confirm the fitting has been sufficiently tightened. Position the gap inspection gauge next to the gap between the nut and body hexes of the fitting and gently attempt to push it into the gap. If the gauge will not enter the gap, the fitting is sufficiently tightened. If the gauge will enter the gap, additional tightening is required.
 Avoiding Interchange and Intermix
When installing your tube fittings, it is important to remember to build your fluid systems with small-bore tube fittings from a single manufacturer. Tube fitting interchange and intermix can lead to potential leaks and poor performance.
Interchange is when a tube fitting from one manufacturer that has been installed on a piece of tubing is then disassembled, and the tubing, nut, and ferrules are then reassembled into a tube fitting body from another manufacturer.
Intermix is when tube fitting components, including the nuts, ferrules, and bodies from two or more manufacturers are mixed and then assembled to make a completed fitting.
Avoiding interchange and intermix is important primarily because there is no industrywide commercial design standard for tube fittings. This means every individual manufacturer follows its own design standards and processes. Therefore, tube fitting components from different manufacturers are not designed to work together. An intermixed or interchanged fitting is essentially a new, untested design.
Some manufacturers may claim their products are interchangeable with other brands. But no manufacturer can reliably and uniformly replicate designs from those of a competitor. Interchanging and intermixing tube fitting components can lead to unpredictable performance, increased costs, and potential safety hazards. It may also void your warranty, which can lead to even higher costs if and when a problem occurs. To avoid performance issues, leaks, higher costs, and safety concerns, it is best practice to never intermix and interchange tube fittings.
 Summary
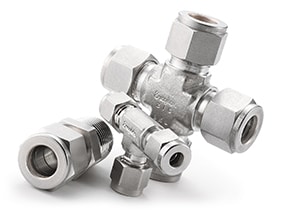
By following the steps outlined in this article, you’ll be better equipped to make reliable connections during your next install. Interested in learning more about the installation process and the nature of leaks, tubing materials, why two-ferrule mechanical grip fittings outperform comparative options, and more? Swagelok offers comprehensive tube fitting training for technicians of any level of experience and skill. Participants learn how to install Swagelok tube fittings with reliability you can count on. The benefits of proper tube fitting installation can help your facility become safer and more profitable.
Related Articles
Reducing Costly Fluid System Leaks and Emissions
Leaks can cause trouble in any process-driven industrial facility. Learn how to reduce common costly fluid system leaks, including fugitive emissions, with the right high-quality products and services.
Tackling Practical Performance Issues in Fluid and Sampling Systems
Learn practical tips on how to improve the performance and accuracy of your fluid and sampling systems from Swagelok.
Four Ways Training and Advisory Services Can Help You Bridge the Skills Gap
Learn how fluid system training and advisory services can help operators bridge a growing skills gap across several industries.


